Chapter 23
Harbor Private Registry
In this session we will deploy and configure a private registry usng Harbor
In this session we will deploy and configure a private registry usng Harbor
All container images that we used in the previous examples were downloaded from Docker Hub which is a public registry.
But in production environments , we have to use private image registry so that we will have better control of images and its security.
In this session , we will deploy a private registry using Harbor
Students needs to deploy this in a separate Ubuntu 16.04 LTS VM (4GB memmory + 2vCPUs). If you are attending live session , then instructor will provide private registry URL and credentials.
In this lab , we use below IP/FQDN. Make sure to create necessary DNS entries or /etc/hosts entries to use the registry once configured.
IP Address : 10.136.102.79
FQDN: k8s-harbor-registry.linxlabs.com
$ curl -fsSL https://download.docker.com/linux/ubuntu/gpg | sudo apt-key add -
$ sudo add-apt-repository "deb [arch=amd64] https://download.docker.com/linux/ubuntu $(lsb_release -cs) stable"
$ sudo apt-get update
$ sudo apt-get install -y docker-ce
Verify Docker service state
$ sudo systemctl status docker --no-pager --lines 0
Example output
● docker.service - Docker Application Container Engine
   Loaded: loaded (/lib/systemd/system/docker.service; enabled; vendor preset: enabled)
   Active: active (running) since Fri 2020-04-10 20:49:29 IST; 2min 27s ago
     Docs: https://docs.docker.com
 Main PID: 4315 (dockerd)
   CGroup: /system.slice/docker.service
           └─4315 /usr/bin/dockerd -H fd:// --containerd=/run/containerd/containerd.sock
docker-compose binary$ sudo curl -L "https://github.com/docker/compose/releases/download/1.25.5/docker-compose-$(uname -s)-$(uname -m)" -o /usr/local/bin/docker-compose
$ sudo chmod +x /usr/local/bin/docker-compose
$ sudo ln -s /usr/local/bin/docker-compose /usr/bin/docker-compose
Create a staging directory first
mkdir ~/harbor_certs/
cd ~/harbor_certs/
Create CA
openssl genrsa -out ca.key 4096
openssl req -x509 -new -nodes -sha512 -days 3650 \
 -subj "/C=IN/ST=Kerala/L=Kollam/O=demo/OU=Personal/CN=ca.linxlabs.com" \
 -key ca.key \
 -out ca.crt
Create SSL extension file
cat > v3.ext <<-EOF
authorityKeyIdentifier=keyid,issuer
basicConstraints=CA:FALSE
keyUsage = digitalSignature, nonRepudiation, keyEncipherment, dataEncipherment
extendedKeyUsage = serverAuth
subjectAltName = @alt_names

[alt_names]
DNS.1=linxlabs.com
DNS.2=k8s-harbor-registry.linxlabs.com
DNS.3=k8s-harbor-registry
EOF
Create a Ceertificate Signing Request(CSR) for Harbor’s nginx service
$ openssl genrsa -out server.key 4096

$ openssl req -sha512 -new \
    -subj "/C=IN/ST=Kerala/L=Kollam/O=demo/OU=Personal/CN=k8s-harbor-registry.linxlabs.com" \
    -key k8s-harbor-registry.linxlabs.com.key \
    -out k8s-harbor-registry.linxlabs.com.csr
Generate and Sign Certificates
$ openssl x509 -req -sha512 -days 3650 \
    -extfile v3.ext \
    -CA ca.crt -CAkey ca.key -CAcreateserial \
    -in k8s-harbor-registry.linxlabs.com.csr \
    -out k8s-harbor-registry.linxlabs.com.crt
After signing , we will get output like below
Signature ok
subject=/C=IN/ST=Kerala/L=Kollam/O=demo/OU=Personal/CN=k8s-harbor-registry.linxlabs.com
Getting CA Private Key
Create certificate directory for harbor
$ sudo mkdir -p /data/cert/
$ sudo cp k8s-harbor-registry.linxlabs.com.crt k8s-harbor-registry.linxlabs.com.key /data/cert/$ sudo curl https://storage.googleapis.com/harbor-releases/release-1.7.0/harbor-offline-installer-v1.7.1.tgz -O$ tar -xvf harbor-offline-installer-v1.7.1.tgzConfigure Harbor.
$ cd harbor
$ sed -i 's/hostname: reg.mydomain.com/hostname: k8s-harbor-registry.linxlabs.com/' harbor.yml

$ sed -i 's@  certificate: /your/certificate/path@  certificate: /data/cert/k8s-harbor-registry.linxlabs.com.crt@' harbor.yml

$ sed -i 's@  private_key: /your/private/key/path@  private_key: /data/cert/k8s-harbor-registry.linxlabs.com.key@' harbor.yml
$ grep k8s-harbor harbor.yml
hostname: k8s-harbor-registry.linxlabs.com
certificate: /data/cert/k8s-harbor-registry.linxlabs.com.crt
certificate: /data/cert/k8s-harbor-registry.linxlabs.com.keyInstall Harbor & Start Harbor.
$ sudo ./install.sh --with-notary --with-clair --with-chartmuseumAfter successful installation , we will get below output.
[Step 5]: starting Harbor ...
Creating network "harbor_harbor" with the default driver
Creating network "harbor_harbor-clair" with the default driver
Creating network "harbor_harbor-notary" with the default driver
Creating network "harbor_harbor-chartmuseum" with the default driver
Creating network "harbor_notary-sig" with the default driver
Creating harbor-log ... done
Creating redis         ... done
Creating registry      ... done
Creating registryctl   ... done
Creating chartmuseum   ... done
Creating harbor-portal ... done
Creating harbor-db     ... done
Creating notary-signer ... done
Creating clair             ... done
Creating harbor-core   ... done
Creating notary-server     ... done
Creating nginx             ... done
Creating harbor-jobservice ... done
Creating clair-adapter     ... done
✔ ----Harbor has been installed and started successfully.----
Also , you can use docker-compose to verify the health of containers
$ sudo docker-compose ps
Name Command State Ports
---------------------------------------------------------------------------------------------------------------------------------------
chartmuseum ./docker-entrypoint.sh Up (healthy) 9999/tcp
clair ./docker-entrypoint.sh Up (healthy) 6060/tcp, 6061/tcp
clair-adapter /clair-adapter/clair-adapter Up (healthy) 8080/tcp
harbor-core /harbor/harbor_core Up (healthy)
harbor-db /docker-entrypoint.sh Up (healthy) 5432/tcp
harbor-jobservice /harbor/harbor_jobservice ... Up (healthy)
harbor-log /bin/sh -c /usr/local/bin/ ... Up (healthy) 127.0.0.1:1514->10514/tcp
harbor-portal nginx -g daemon off; Up (healthy) 8080/tcp
nginx nginx -g daemon off; Up (healthy) 0.0.0.0:4443->4443/tcp, 0.0.0.0:80->8080/tcp, 0.0.0.0:443->8443/tcp
notary-server /bin/sh -c migrate-patch - ... Up
notary-signer /bin/sh -c migrate-patch - ... Up
redis redis-server /etc/redis.conf Up (healthy) 6379/tcp
registry /home/harbor/entrypoint.sh Up (healthy) 5000/tcp
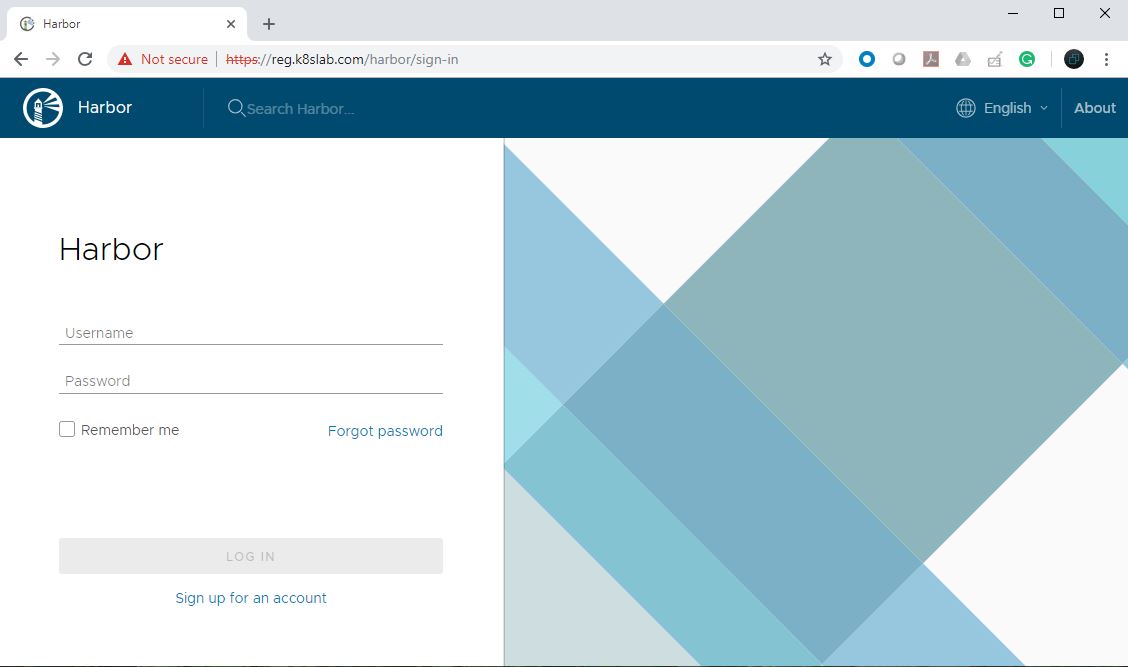
registryctl /home/harbor/start.sh Up (healthy)Now , you will be able to access Harbor UI using URL “https://k8s-harbor-registry.linxlabs.com” (Need DNS entry/host file entry) or use the IP of the VM “https://10.136.102.79”
Default username & password is admin/Harbor12345
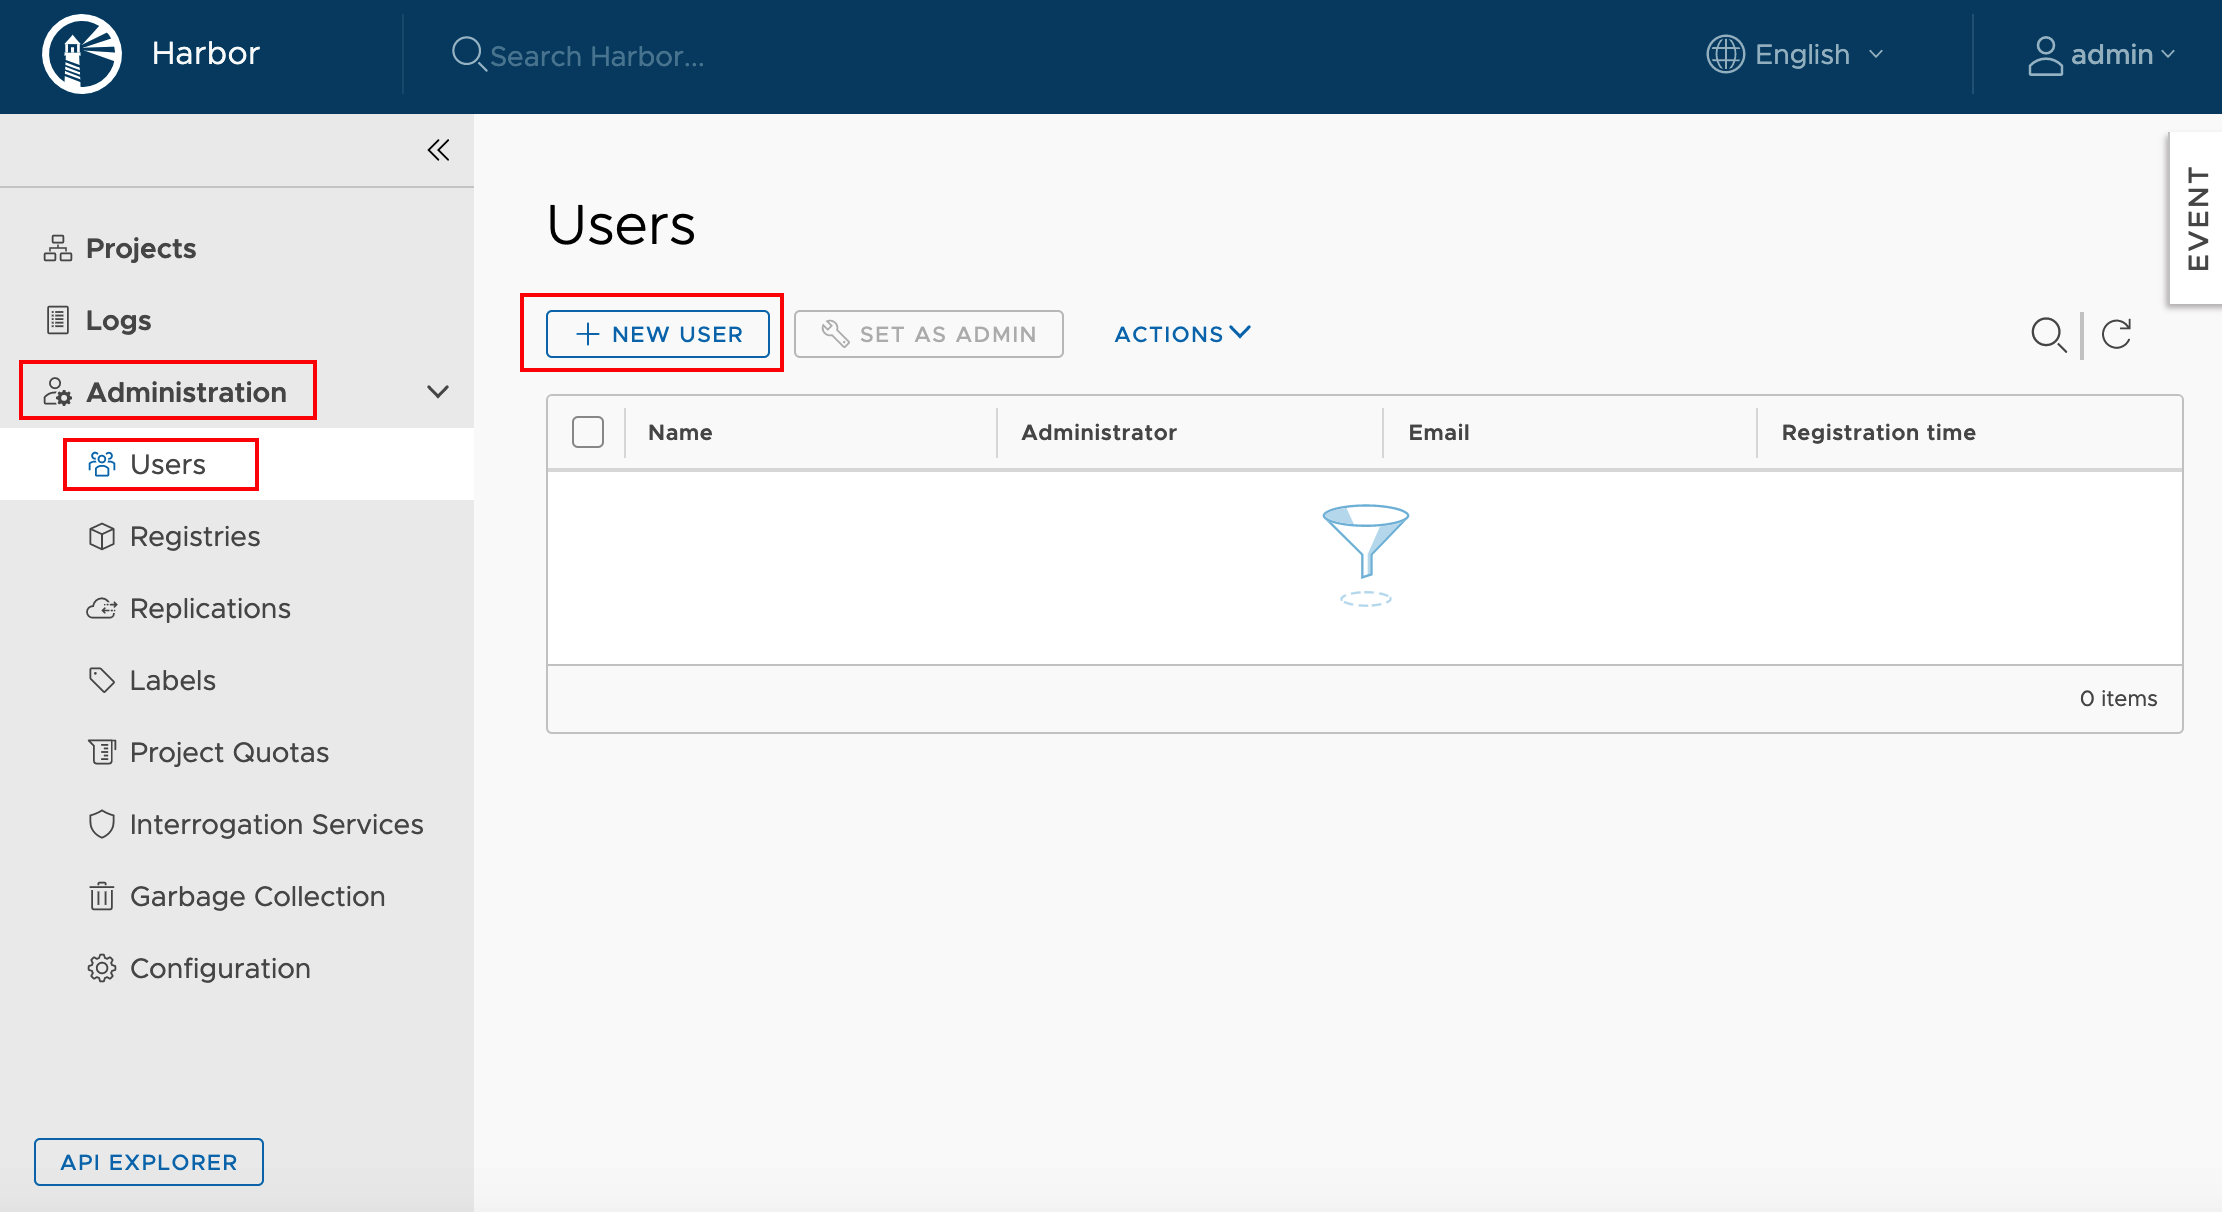
In this session , we will create a new user and then we will add that user to the default public project on Harbor.
Administration -> Users -> + NEW USER
 Fill the user details and set password for the account.
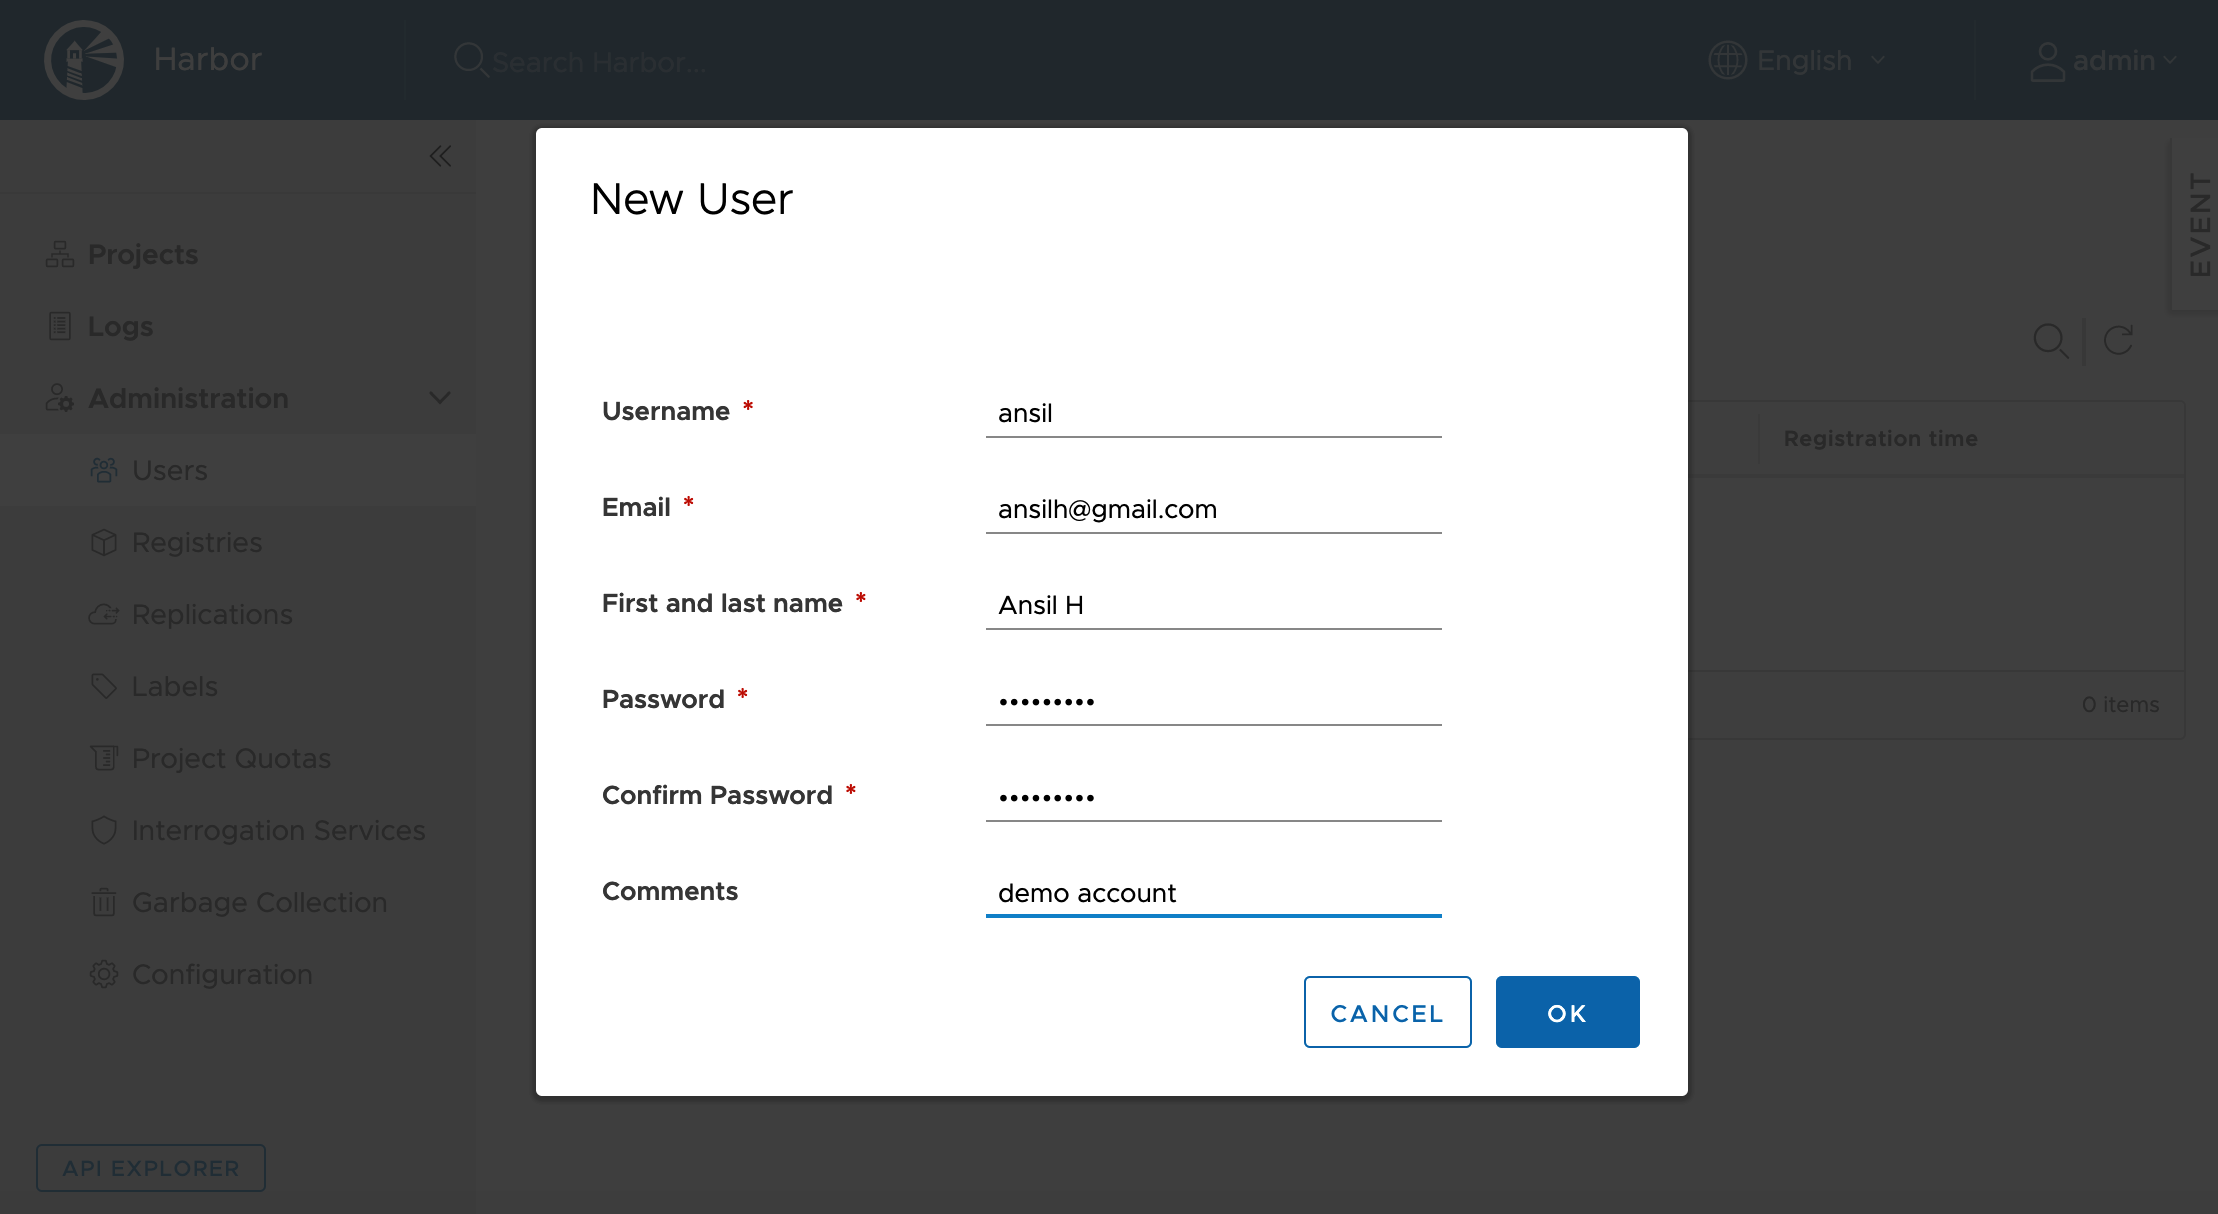 User will be listed after creation

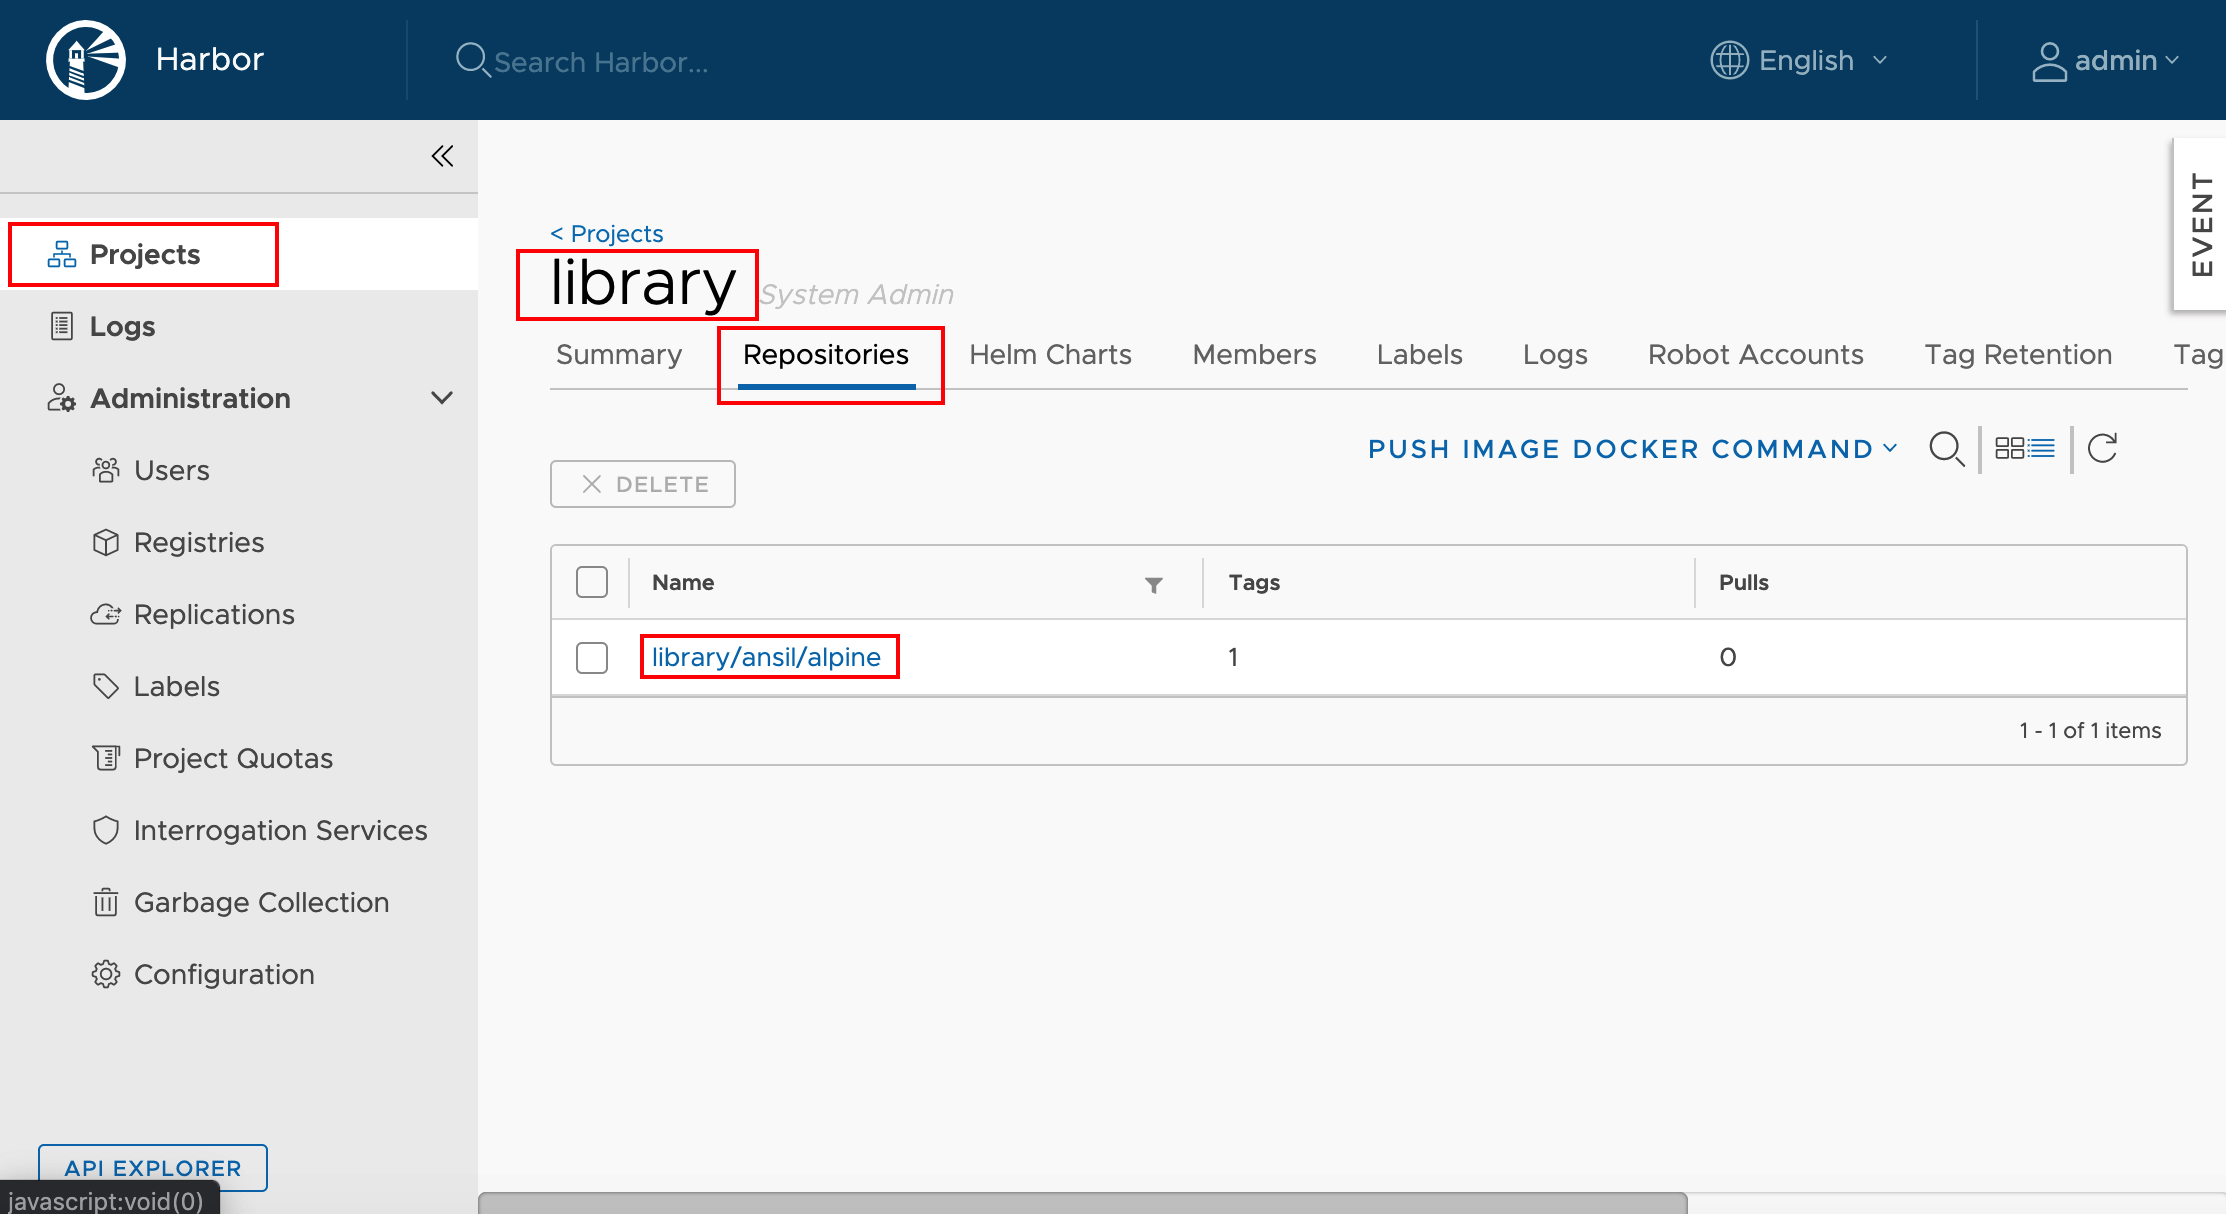
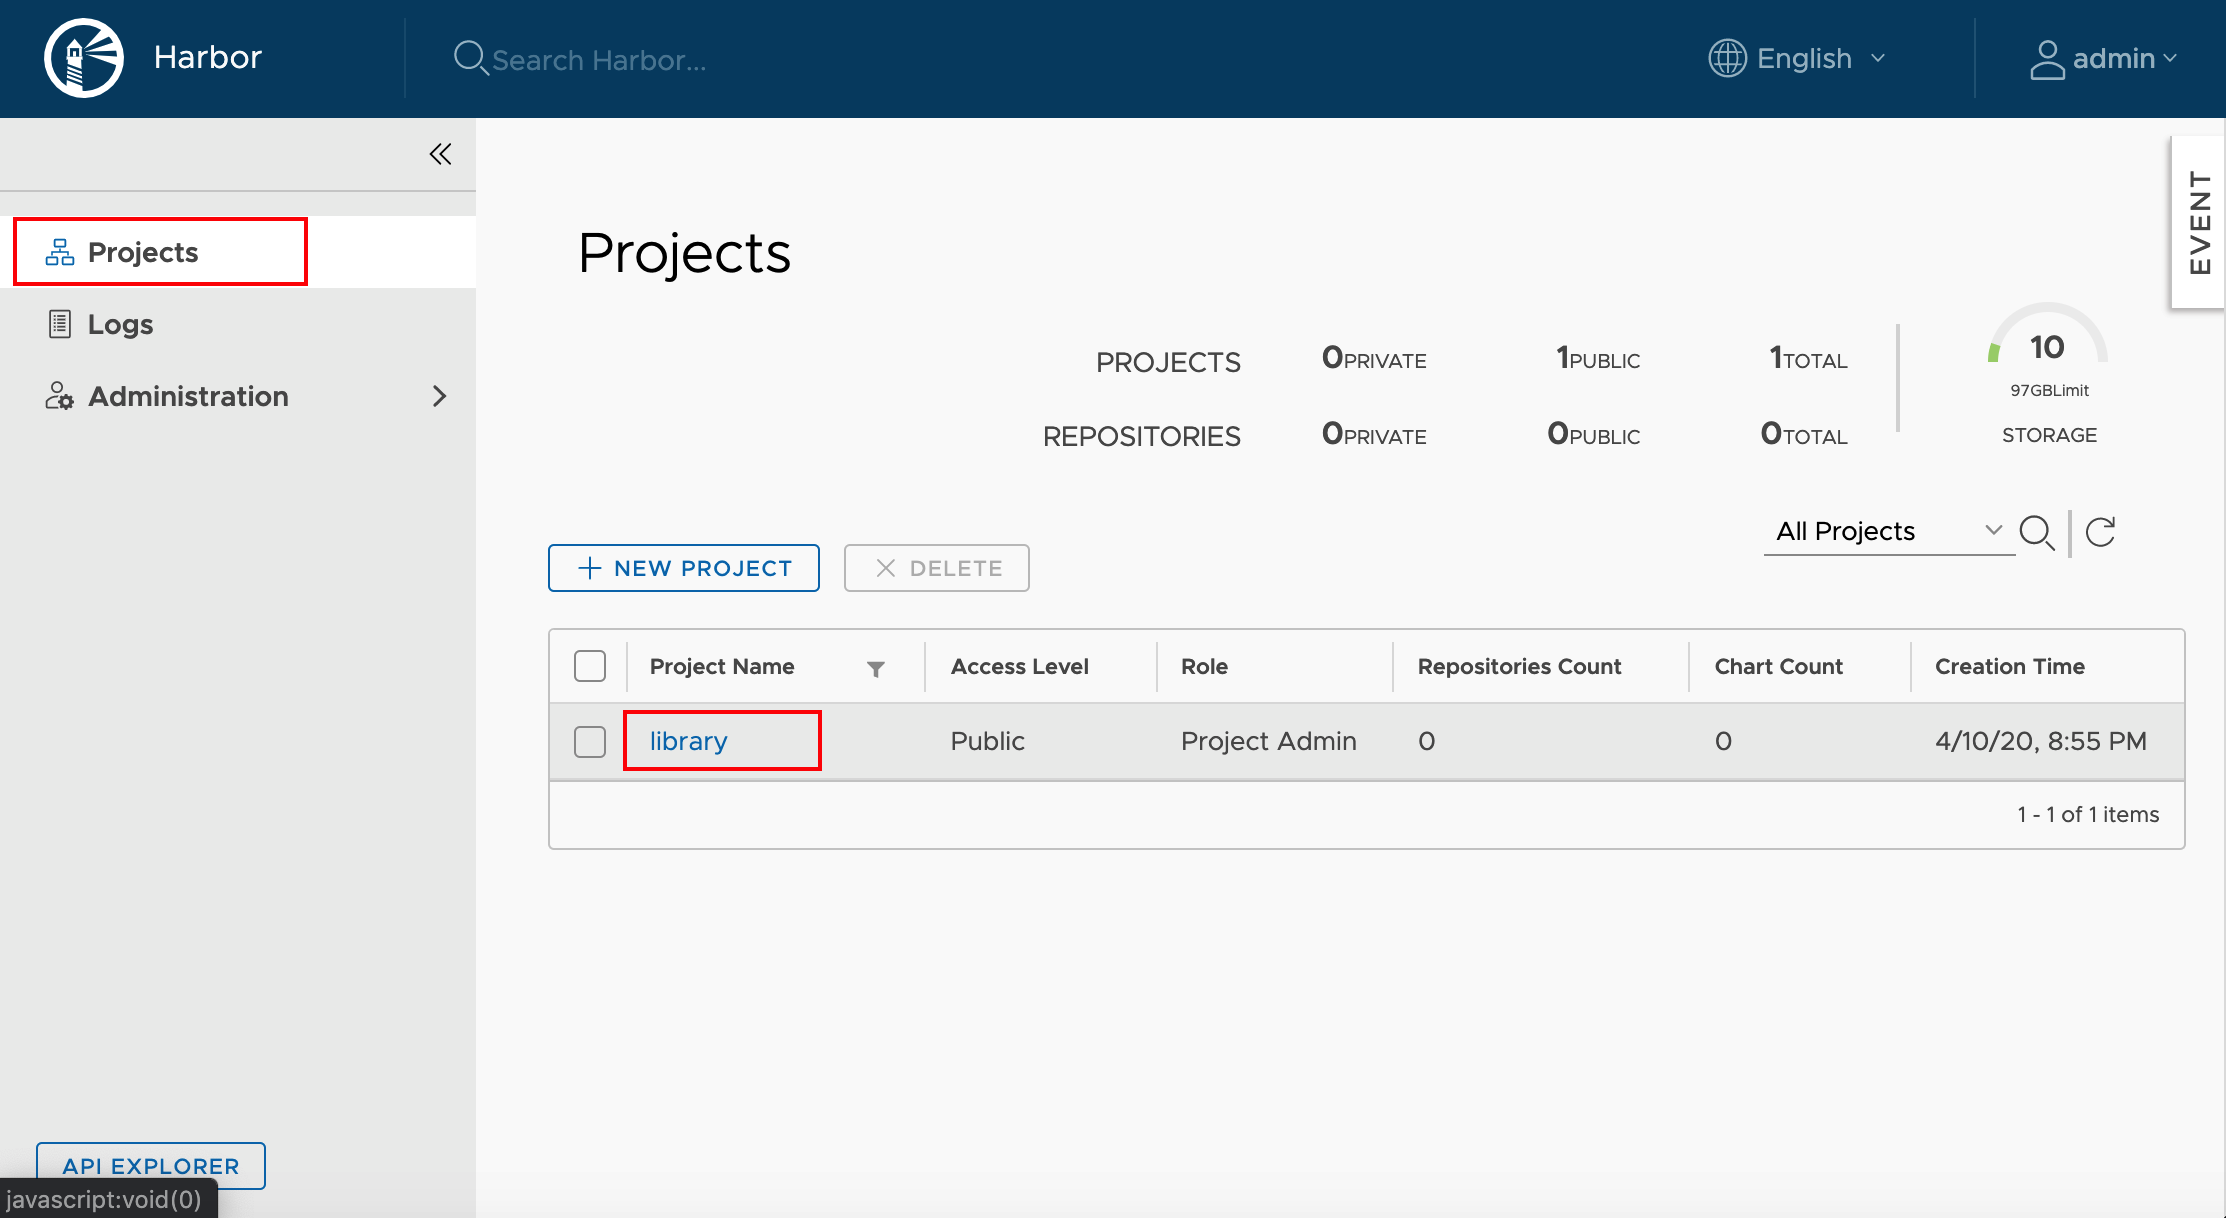
library project.Projects -> library
Members -> + USER
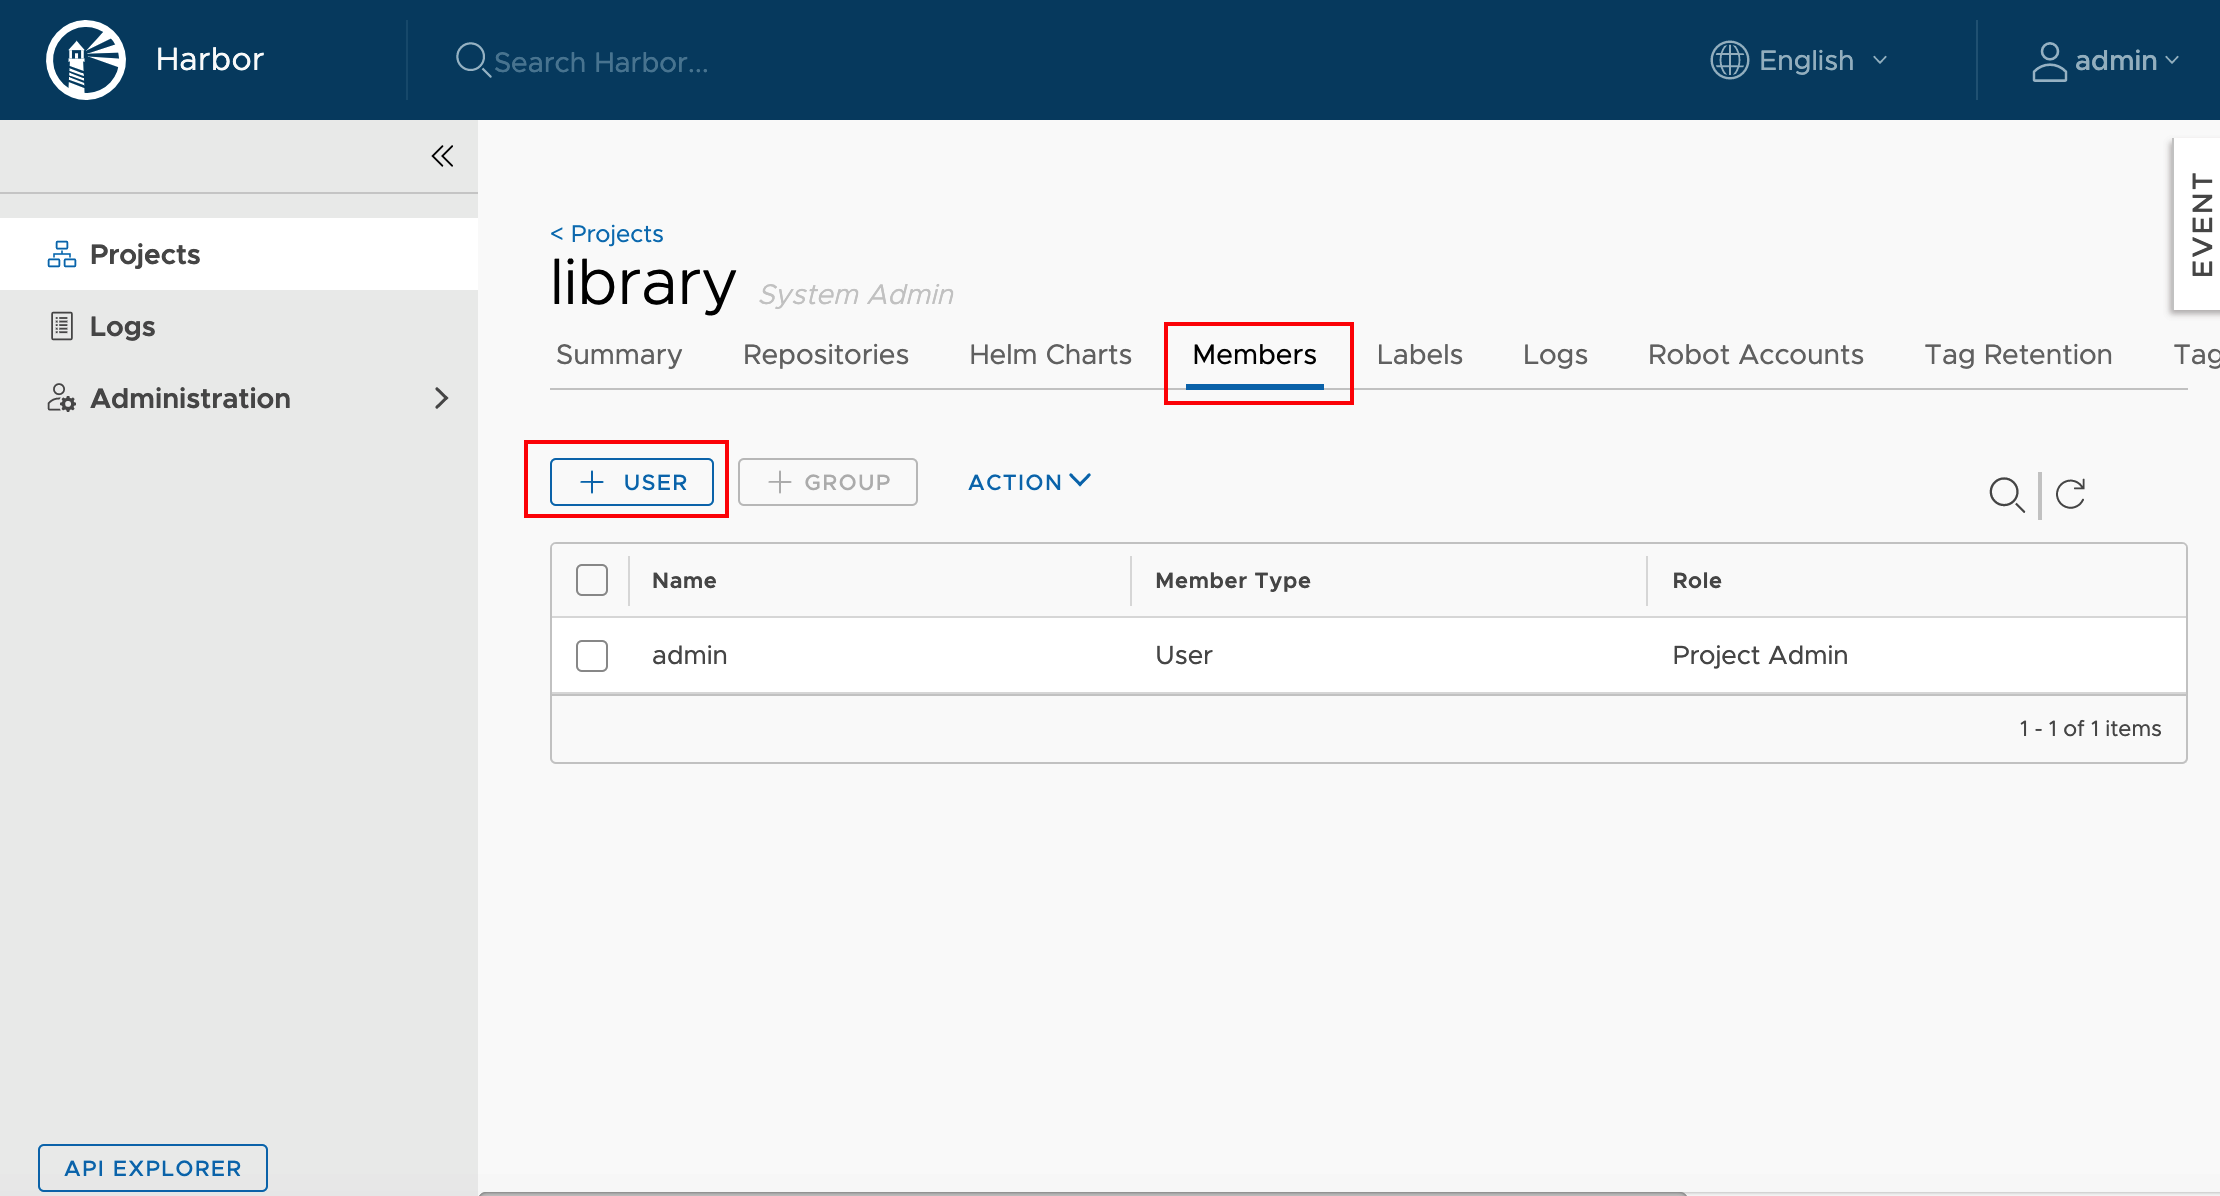
Add new user to the project as Developer
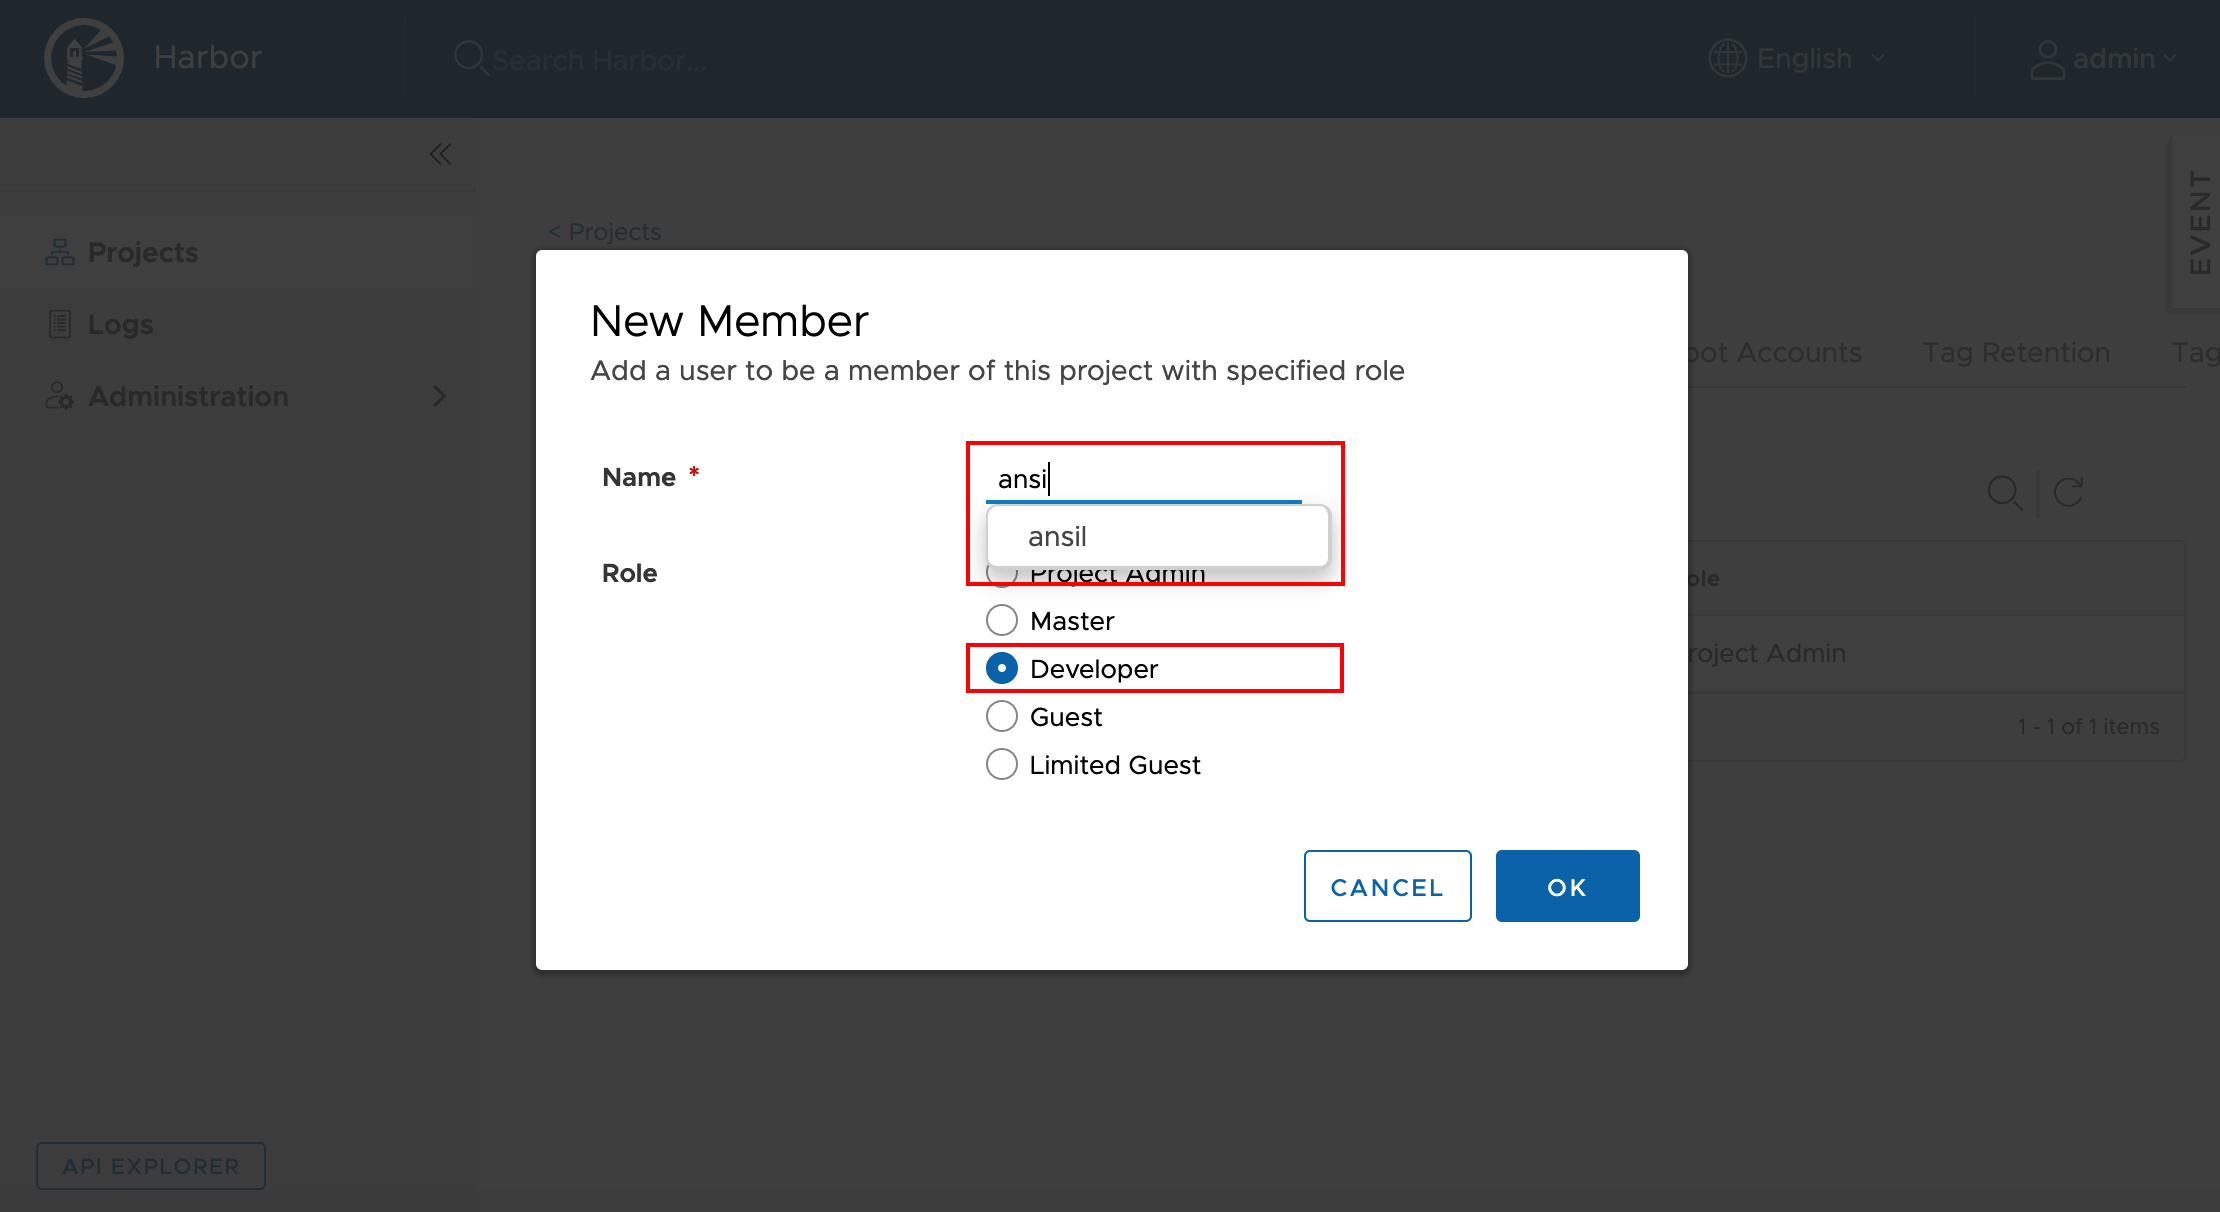
Now we can use this account to push images to this Private registry.
In next session , we will reconfigure docker to use this registry.
In part 1, we have generated CA certificates. Using the same CA , we will generate docker client certificates. So , logon to the same harbor host and then go the directory where CA certificates were stored. In our case ;
cd ~/harbor_certs/Generate a CSR for docker and get it signed for the client
$ openssl genrsa -out docker-client.linxlabs.com.key 4096
$ openssl req -sha512 -new \
    -subj "/C=IN/ST=Kerala/L=Kollam/O=demo/OU=Personal/CN=docker-client.linxlabs.com" \
    -key docker-client.linxlabs.com.key \
    -out docker-client.linxlabs.com.csr
Sign Certificates
$ openssl x509 -req -sha512 -days 3650 \
    -extfile v3.ext \
    -CA ca.crt -CAkey ca.key -CAcreateserial \
    -in docker-client.linxlabs.com.csr \
    -out docker-client.linxlabs.com.crt
You will get an output like below.
Signature ok
subject=/C=IN/ST=Kerala/L=Kollam/O=demo/OU=Personal/CN=docker-client.linxlabs.com
Getting CA Private Key
Docker needs the certificate in PEM format , so lets convert the client certificate.
$ openssl x509 -inform PEM -in docker-client.linxlabs.com.crt -out docker-client.linxlabs.com.certOn docker client system , create directories to store certificates.
$ sudo mkdir -p /etc/docker/certs.d/k8s-harbor-registry.linxlabs.comCopy certificate from CA server (harbor host) to the docker client host , then follow below procedure.
$ sudo cp ca.crt docker-client.linxlabs.com.key docker-client.linxlabs.com.cert /etc/docker/certs.d/k8s-harbor-registry.linxlabs.comRestart docker after placing certificates.
$ sudo systemctl restart dockerNow try to logon to the private registry.
If there is no DNS entry for registry FQDN , then make sure the entry is added to /etc/hosts
$ docker login k8s-harbor-registry.linxlabs.com
Username: ansil
Password:
WARNING! Your password will be stored unencrypted in /root/.docker/config.json.
Configure a credential helper to remove this warning. See
https://docs.docker.com/engine/reference/commandline/login/#credentials-store

Login Succeeded
Verify docker image pull/push
Download an image from docker hub
$ sudo docker pull alpine
Using default tag: latest
latest: Pulling from library/alpine
aad63a933944: Pull complete
Digest: sha256:b276d875eeed9c7d3f1cfa7edb06b22ed22b14219a7d67c52c56612330348239
Status: Downloaded newer image for alpine:latest
docker.io/library/alpine:latest
$ docker images
REPOSITORY TAG IMAGE ID CREATED SIZE
alpine latest a187dde48cd2 2 weeks ago 5.6MBTag the image for pushing it to private registry
$ docker tag alpine:latest k8s-harbor-registry.linxlabs.com/library/ansil/alpine:latest$ docker push k8s-harbor-registry.linxlabs.com/library/ansil/alpine:latestOutput
The push refers to repository [k8s-harbor-registry.linxlabs.com/library/ansil/alpine]
beee9f30bc1f: Pushed
latest: digest: sha256:cb8a924afdf0229ef7515d9e5b3024e23b3eb03ddbba287f4a19c6ac90b8d221 size: 528
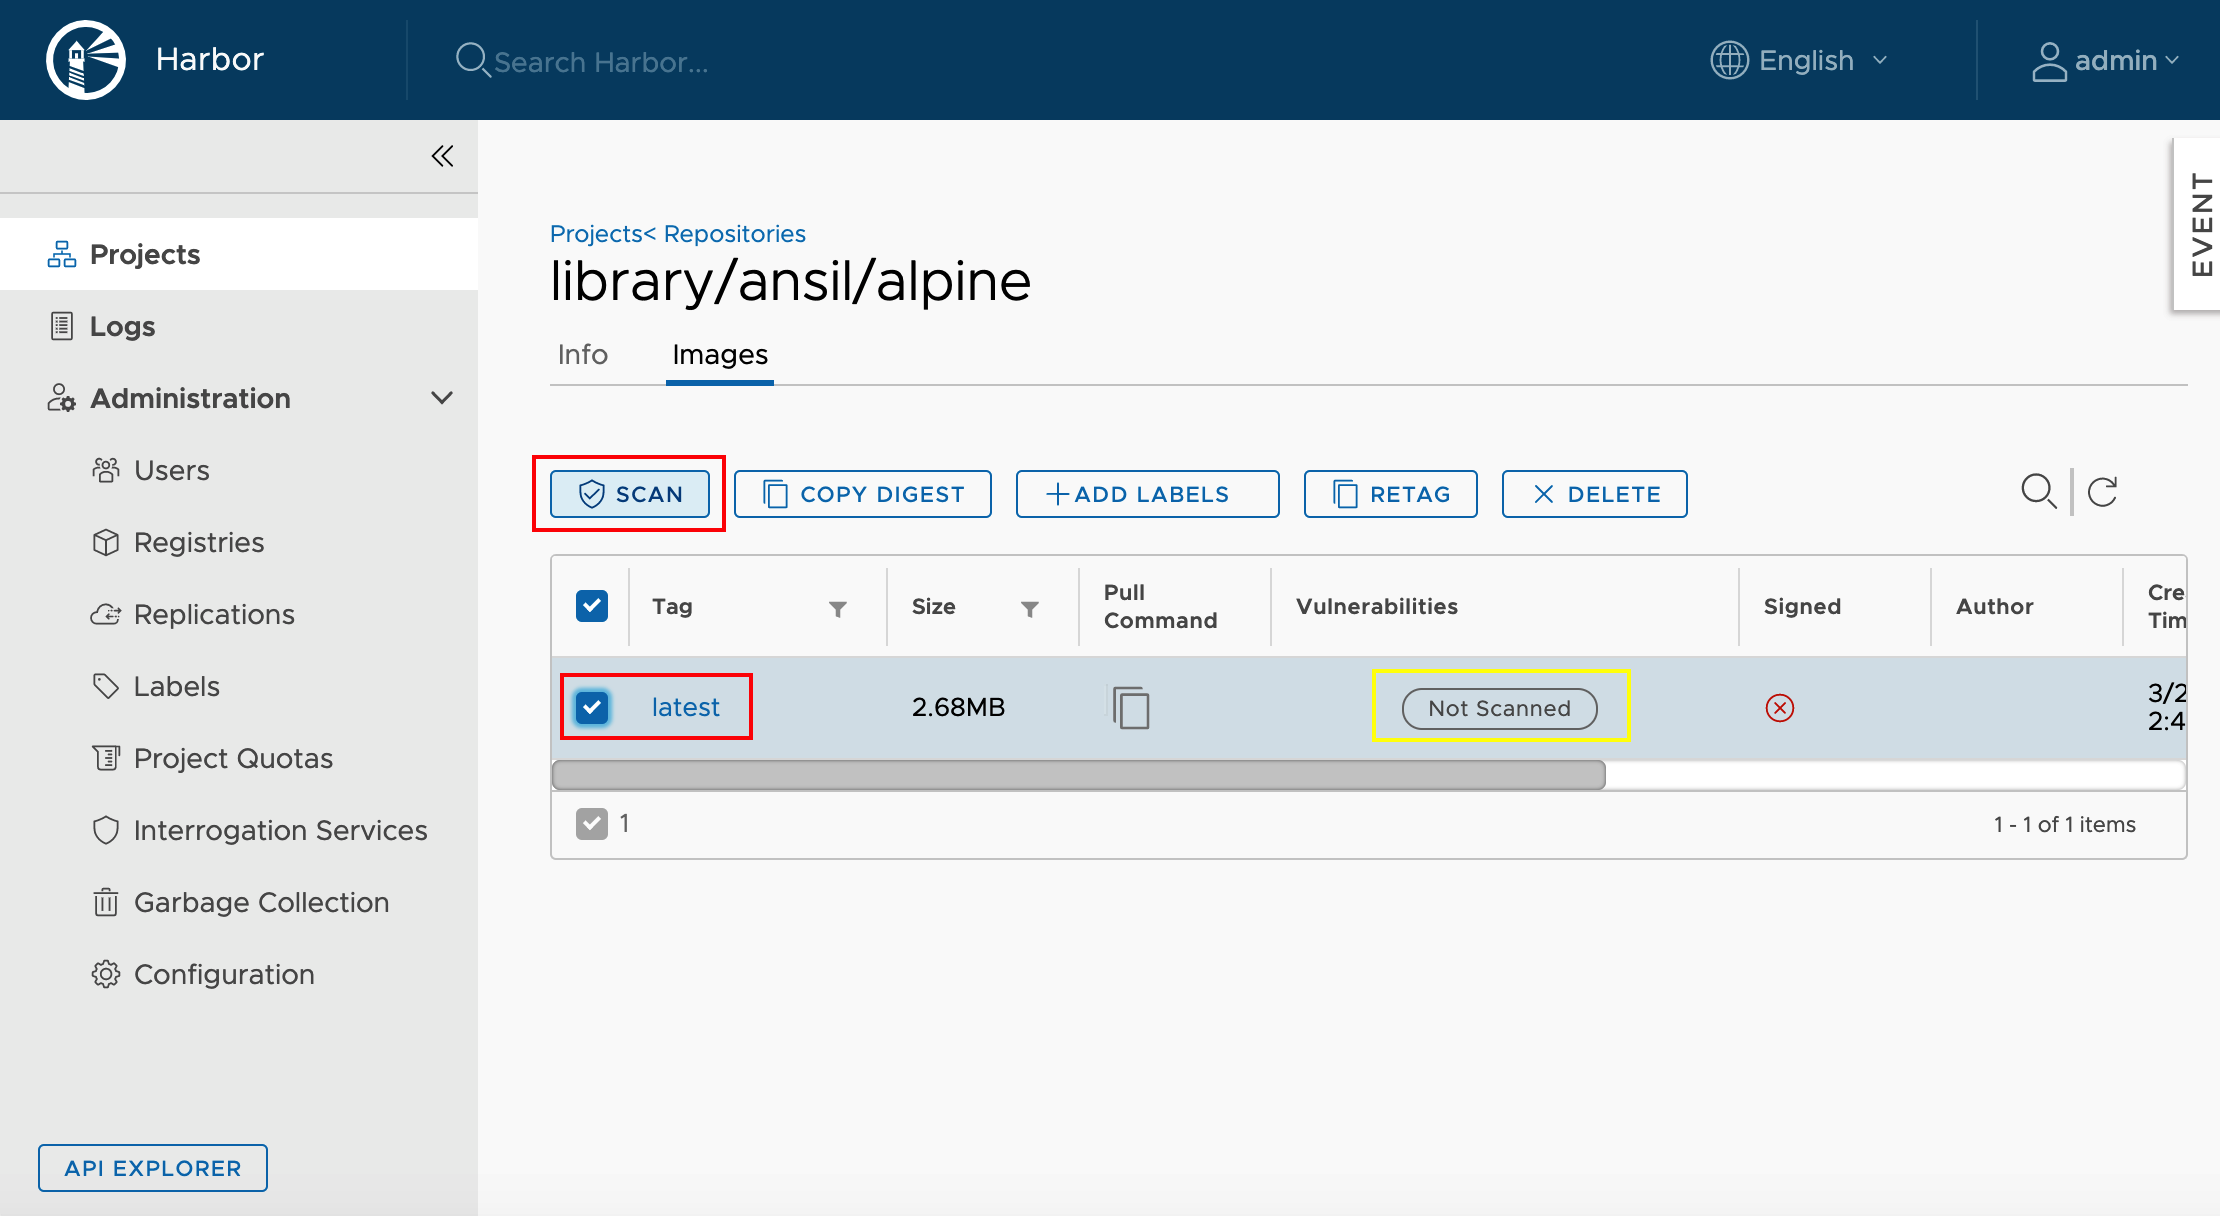
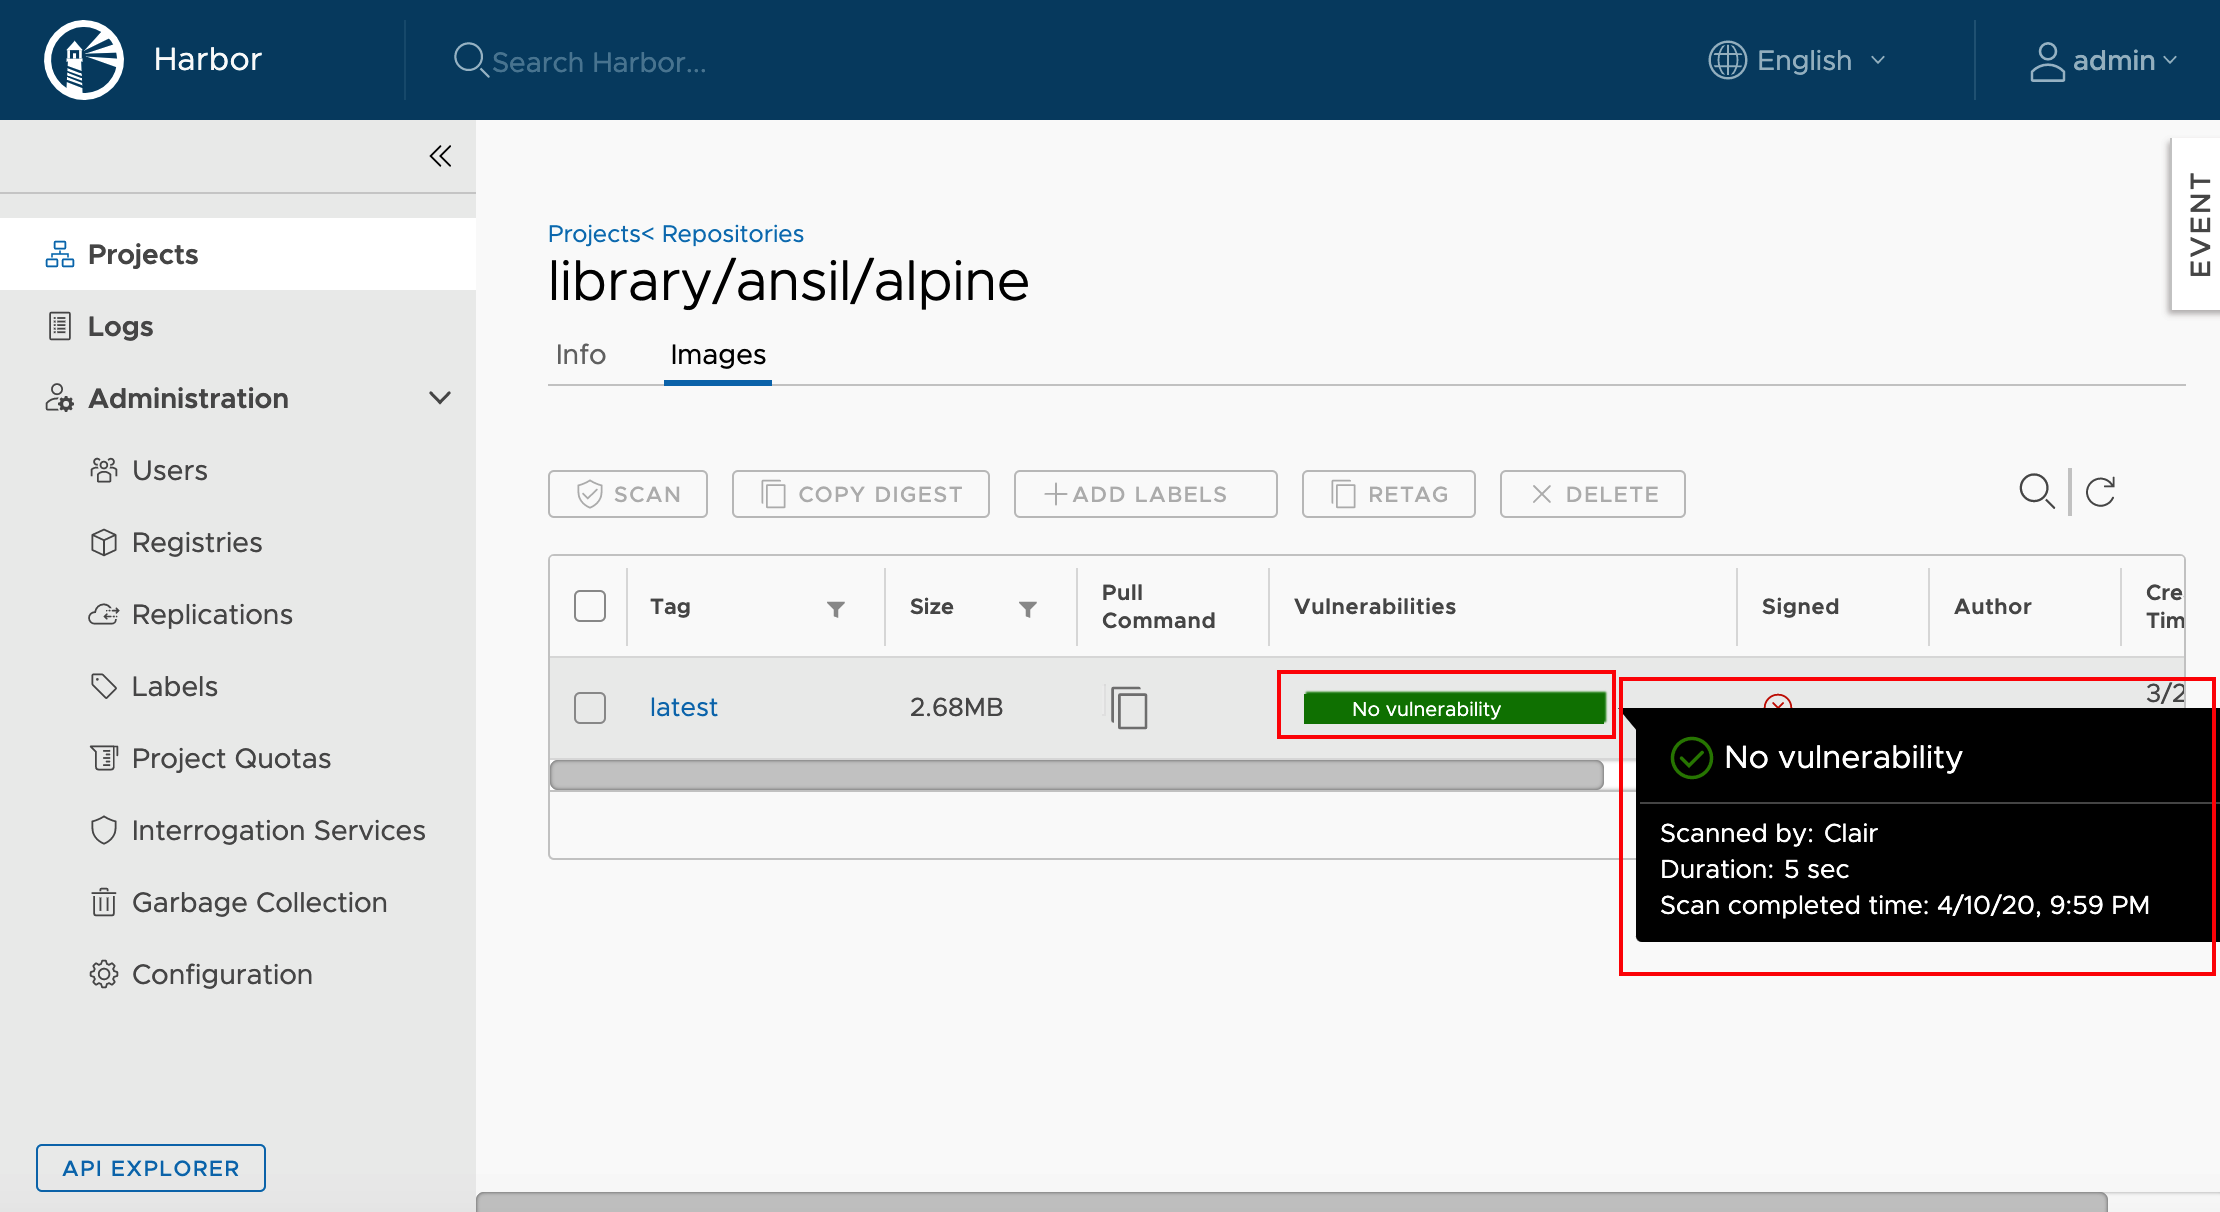
Logon to Harbor UI and verify the status of the new image & scan it for vulnerability